|
| |||||
|
| |||||
Chapter 7 - How to Install Magic Workbench Icons
In this chapter we will Install Magic Workbench Icons.
If you want to have NewIcons and Scalos Installed then Please skip this
chapter.
Also this version of Magic Workbench is shareware so you will need to register
to get the full version. (I prefer NewIcons as 1. They look better and 2. Has no
limitations.)
Lets begin...If you have quit WinUAE after the sixth chapter, then re-launch the
program, left click the config you made, click the Load button and click OK to
start emulation.
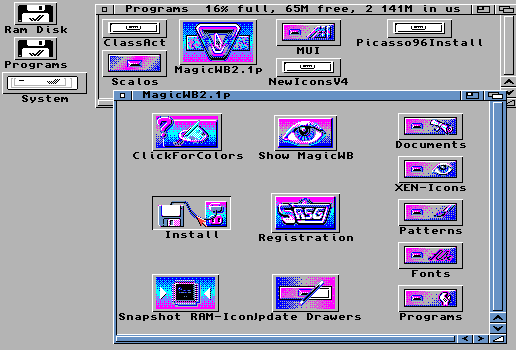
1. Double click Programs, double click MagicWB2.1p and then on Install.

2. Read the info and press return/enter.
3. Read the next screens info and press return/enter.

4. When asked, Start the installation? Type in Y and press
return/enter.
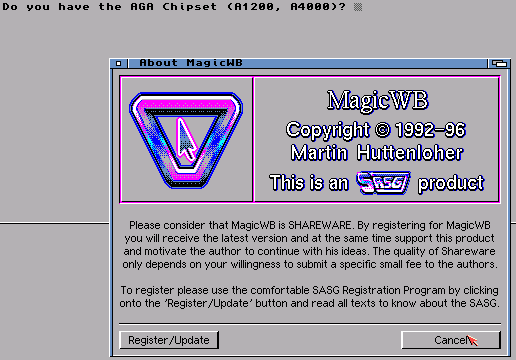
5. You will get an About MagicWB window. When you see the next question,
Do you have the AGA chipset (A1200, A4000)? Click cancel on about box, click on
the MagicWB Installation window, type in Y and press return/enter.

6. When asked, Do you want special AGA background? Type in N and press return/enter. (Press Y if you have the registered version)

7. When asked, Do you want HD icon installed to other partitions? Type in Y and press return/enter.

8. When asked, Please enter the name of the desired partition, type...
Programs: and press return/enter.
9. When asked again, Do you want HD icon installed to other partitions?
Type in N and press return/enter. (Press Y if you have more partitions)
10. When asked, Would you like to have them installed? Type in N and
press return/enter. (Press Y if you have the registered version)

11. Read the info and press return/enter.
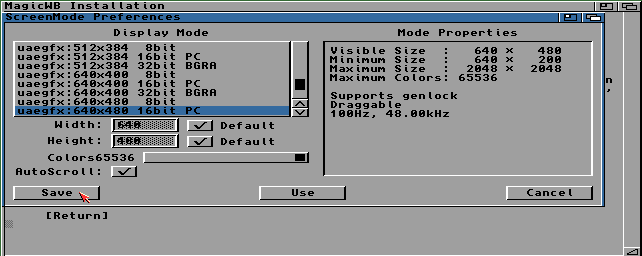
12. Screen mode prefs will open (it should already be set as shown in the
picture below). Make sure uaegfx:640x480 16bit PC or higher is selected and
colours set to maximum. Then Click Save.

13. Read the info and press return/enter another 3 times.
14. Click cancel on About MagicWB window.
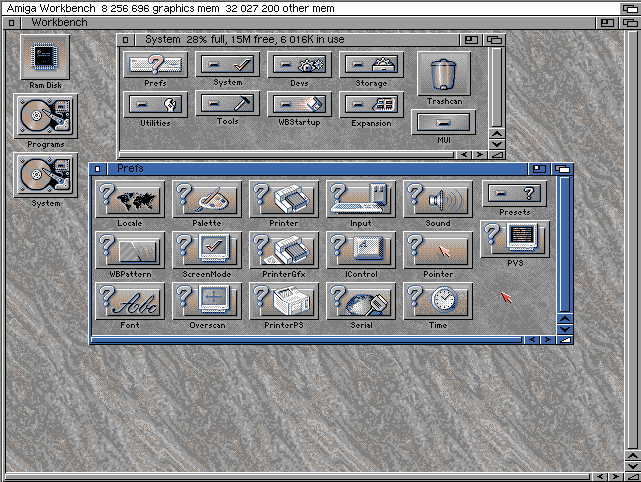
15. We have now Installed MagicWB. Now restart the Amiga by holding down
the 3 keys to finish setup. CTRL + INSERT + HOME, or in newer versions of WinUAE
press CTRL + LEFT WINDOW + RIGHT WINDOW keys.

|
|
All chapters only on this page are Copyright (c) Paul, The Green Amiga Alien and should not be copied, altered or uploaded to another site without the authors permission. Web site design Copyright (c) CPC464.