|
|
|
|
|
|
|
|
|
|
|
|
|
|
|
|
|
|
|
|
|
|
|
|
|
|
|
|
Chapter 1 - Setting up and Configuring WinUAE
Welcome to Chapter 1. This chapter shows you the steps required to setup
your copy of WinUAE and to make sure it is working.
1. Download WinUAE executable (Setup program) from
www.winuae.net or
Emulators Downloads
2. Install WinUAE and follow on screen instructions.
3. Next copy your Kick-Start rom file into C:\Program Files\Winuae (or
make a new directory and name it kickstarts then copy you ROM file into this new
directory.)
4. Next make another new directory in C:\Program Files\Winuae and name it
Hard Disks
5. In Hard Disks make another directory called programs and copy all
files you downloaded into this programs directory. (lha.run, Picasso96.lha, ‘ClassAct2Demo.lha
& NewIcons46.lha’ or MagicWB21p.lha, mui38usr.lha and Scalos.lha).
6. Now close all open explorer windows and lunch WinUAE.
7. If it asks you to ‘Detect 16-bit Pixel format’, click Yes.
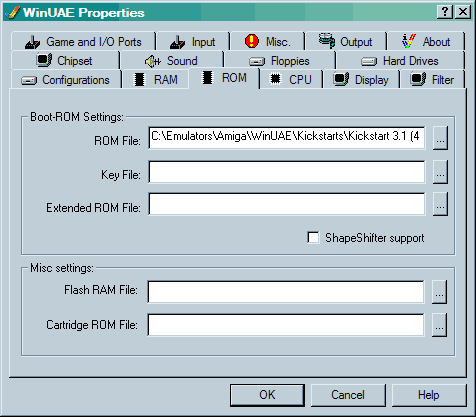
8. First goto the ROM tab and click ‘...’ button and set the path
to your kick-start 3.1 ROM File.
9. Next goto the Hard Drives tab.
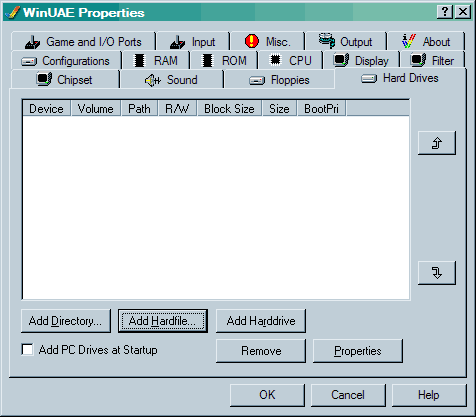
10. Left click Add Hardfile...
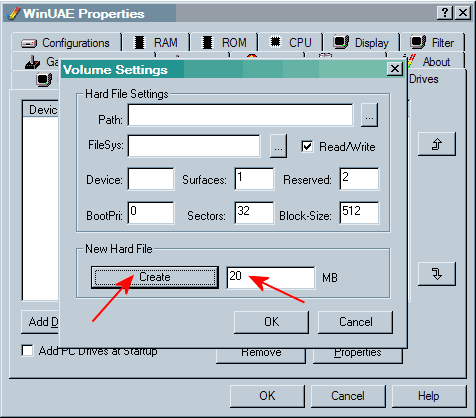
11. In older versions of Winuae (before 22r1) you have to input the hdf
size using bytes and have to work it all out, if you do not you could cause data
corruption when the hdf runs out of free space. So to make a 22MB hdf you need
to type in 23068672 into the bytes box and click Create button.
If you are using Winuae 22r1 or newer versions you type in Megabytes, so type 22 instead. (Thanks to andreas for the guide correction.)
12. Now goto ‘C:\Program Files\WinUAE\Hard Disks’ directory, type in a
file name Workbench3.1 and click the Save button. Then click OK in the
‘Volume Settings’ window.
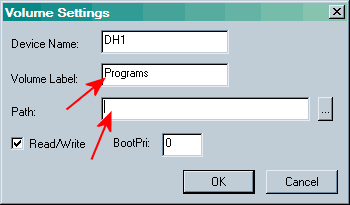
13. Click Add Directory...
14. In Volume Name/Label: type in Programs
15. In Path type C:\Program Files\WinUAE\Hard Disks\Programs (or
click ‘...’ button and point to this directory) And then click OK.
16. Next goto the CPU tab
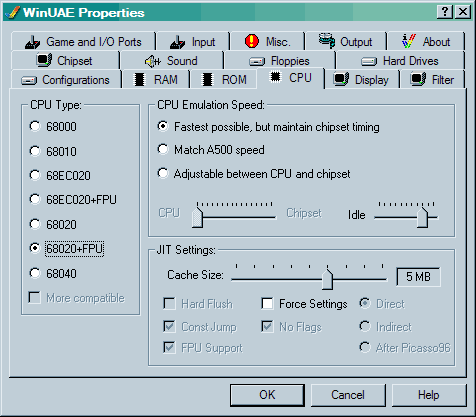
17. Under CPU Type:- select 68020+FPU
18. Under CPU Emulation Speed:- select Fastest possible, but maintain
chipset timing.
19. Under JIT settings set the Cache Size slider to around 4 or 5 Meg.
(optional)
20. Goto the RAM tab

21. Select The following Memory Settings to:-
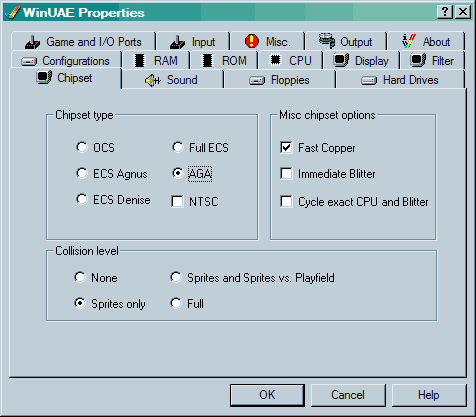
22. Under the Chipset tab just tick AGA
23. Now Goto the display tab
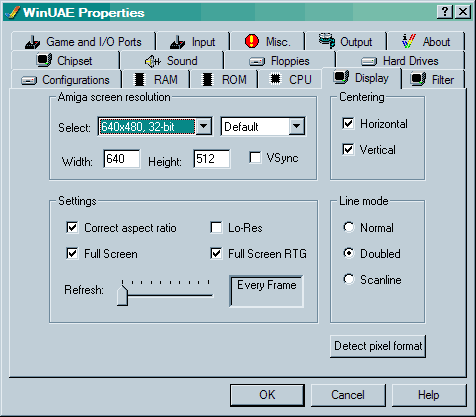
24. In the option Amiga screen resolution, Select via the drop-down box -
640x480 32-bit or 16-bit.
25. Under Centring:- Tick both the Horizontal and Vertical
settings.
26. Under Settings:- Tick Correct aspect ratio, Full-Screen
and Full-Screen RTG boxes.
27. Under Line mode:- Tick Doubled.
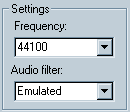
28. Now Goto the Sound tab
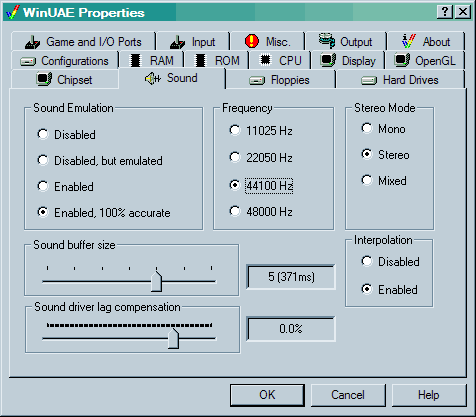
29. Set the following options:-
 In WinUAE 0.8.22
Release 5 you will notice the Interpolation options have been changed to
Disable, RH and Crux: I find Crux to be the best
option to use.
In WinUAE 0.8.22
Release 5 you will notice the Interpolation options have been changed to
Disable, RH and Crux: I find Crux to be the best
option to use. 30. Last goto Configurations tab
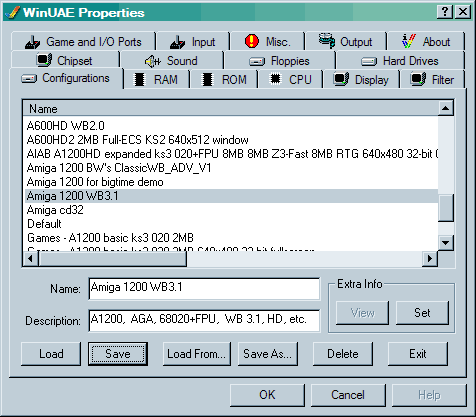
31. Type in Name box i.e.:- Amiga 1200 WB3.1 and Type something in Description box and click the Save button (you should then see the config appear in the list.) That concludes Chapter 1.
|
|
All chapters only on this page are Copyright (c) Paul, The Green Amiga Alien and should not be copied, altered or uploaded to another site without the authors permission. Web site design Copyright (c) CPC464.